Difference between revisions of "mosCura:Result Custom View"
Jump to navigation
Jump to search
MartinHeide (talk | contribs) |
MartinHeide (talk | contribs) |
||
| Line 2: | Line 2: | ||
==Types== | ==Types== | ||
===Shared=== | ===Shared=== | ||
| − | + | To create a shared view | |
| + | #Click Machine Config | ||
| + | #Click the plus sign on the Shared Result Views | ||
| + | <gallery> | ||
| + | File:MosCura_ResultCustomView_4.png|Click plus to create shared view | ||
| + | </gallery> | ||
===Personal=== | ===Personal=== | ||
| Line 23: | Line 28: | ||
<gallery> | <gallery> | ||
File:MosCura_ResultCustomView_1.png|Form to fill out | File:MosCura_ResultCustomView_1.png|Form to fill out | ||
| − | File:MosCura_ResultCustomView_2.png|Form with values | + | File:MosCura_ResultCustomView_2.png|Personal Form with values |
File:MosCura_ResultCustomView_3.png|Personal view | File:MosCura_ResultCustomView_3.png|Personal view | ||
| + | File:MosCura_ResultCustomView_5.png|Shared Form with values | ||
| + | File:MosCura_ResultCustomView_6.png|Shared view | ||
</gallery> | </gallery> | ||
Revision as of 15:20, 5 September 2019
The custom view can be configured as Shared or personal.
Contents
Types
To create a shared view
- Click Machine Config
- Click the plus sign on the Shared Result Views
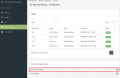
Click plus to create shared view

Personal
To create a personal view
- Click Result -> My views -> Create View
This view will only be visible for the user, that created it.

My Views

Create view
To create a custom view
- Type in view name
- Type in a description
- Select the state Active or Inactive.
- Select Show on the result tags you wish to see
- Drag the tags to fit the order you wish
- Click Create
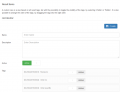
Form to fill out
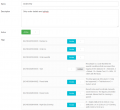
Personal Form with values
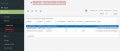
Personal view
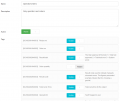
Shared Form with values
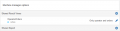
Shared view


