TestIT:Installation
Contents
11 Installation
Folder structure
The files needed for the installation are placed in this folder structure. Before an installation, the Nolek folder must be copied into the C root.
The structure is:
C:/Nolek
- Applicationfiles - Guide images, text files
- Backup - Database, previous TestIT versions, etc.
- Documentation - Sequens diagram, PI diagram, etc.
- Install - Installation files (TestIT, MS SQL, TwinCat)
- License - TestIT license folder
MS SQL server 2012 Express
When MS SQL Server is being installed, both the SQL Server and the Management Studio needs to be installed.\\
MS SQL Server:
The guide to install MS SQL server:
- Install or verify the Microsoft .Net Framework 4.0
- Open the folder C:\Nolek\Install\SQL\2012 – Express and select the correct version of Windows (32 or 64 bit according to the PC)
- Double-click on the SQLEXPR_x[32 or 64]_ENU.exe file and press Run
- Select the New SQL Server stand-alone installation or add features to an existing installation
- Check the “I accept the license terms” and press Next
- Press Next in the product update
- Press Next in install setup files
- Make sure to have the Database Engine Service and SQL server Replication checked, and then press Next
- Write a name for the instance and press Next
- Wait for the setup to continue in the Next window server configuration, then press Next
- Select the Mixed Mode and write a system administrator password. Standard for TestIT is “sa4TestIT”, press Next
- Select if Error Reporting is wanted or not, and press Next
- Wait for the installation to finish and press Close
- Go to management studio setup
Management studio:
(In version 2012 the management studio is separated.)
- Install or verify the Microsoft .Net Framework 4.0
- Open the folder C:\Nolek\Install\SQL\2012 Express and select the correct version of Windows (32 or 64 bit according to the PC)
- Double-click on the SQLManagementStudio_x[32 or 64]_ENU.exe file and press Run
- Select the New SQL Server stand-alone installation or add features to an existing installation
- Wait for the Setup Support Rules and check to finish, then press Next
- Wait for the Setup files to install. Then select 'Add features…' and select the instance you just created (SQL Server) in the dropdown box, then press Next
- Select the Management Tools - Basic and press Next
- Wait for the window to change and select if Error Reporting is wanted or not, and press Next
- Wait for the installation to finish and press Close
- Go to Restore database
Restore database
Restore a full database:
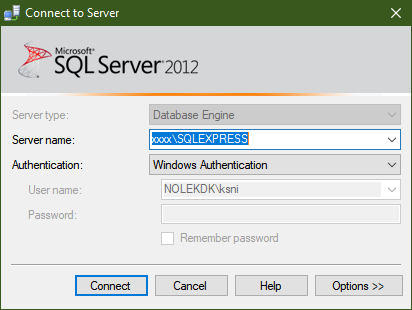
- Press "Connect":
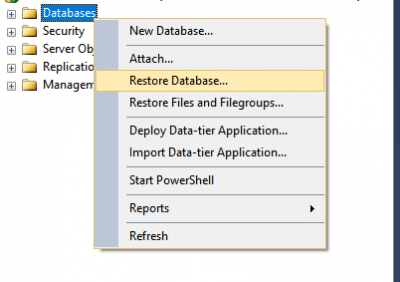
- Right click on “Databases”, and select “Restore”:
- Select “Device”, and the “…”
- Find the database to restore (TestITProd, or TestITSetup)
- Press OK
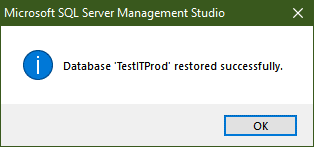
- The database is now restored.
- Close “SQL Server Management Studio”, and Open TestIT
TwinCat 3
This installation is if TestIT is running with I/O.
Install TwinCat 3:
- Open the installation folder: C:\Nolek\Install\TwinCat
- Double-click on the setup file and press Next
- Select 'I accept the terms in the license agreement', and press Next
- Write user name and organization
- Select Custom, and press Next
- May vary depending on the installed software. Select Microsoft… and press 'Next'
- Press Install, then Next and in the end press Finish
- Restart the system
Create a new TwinCat project:
- Open Visual Studio to create a new project
- Select Start and then New project
- Select TwinCAT Project and then the TwinCAT XAE Project (XML format)
- Write a name: 'TwinCAT IO'
- Select location (where to save the file) and press OK
This page will be visible. Note! Your window may look different.
Setup the communication port:
- Select TwinCat
- Select Show Realtime Ethernet Compatible Devices…
- Select the network card to use for TwinCat, and press Enable
- Now, follow the instructions of new task, IO configuration, and IO scan (descripted below)
- After this, go to Install TestIT
New task:
- Right-click on tasks and select add new item
- Write the name IO, and write comment if there are any and press OK
- Verify that the task is created
- Double-click on IO and verify that the settings look like the image. Maybe the port number is 350 – That is ok
IO Configuration:
- Right-click on inputs or on output, and select Add new item
- Enter the symbol configuration. (Eg. Name: IN01, DataType: Bool) and press OK
- The name and description can be changed; just double-click on the symbol and change it
- Repeat for all symbols
IO Scan:
- Connect the I/O modules
Activate License
Install TestIT
Install TestIT:
- Go to the installation folder (C:\Nolek\Install\TestIT)
- Double-click on the setup.exe file
- Press Install and follow the instructions of TestIT License
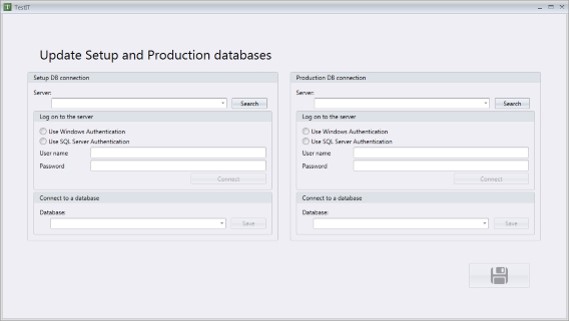
When the TestIT application is installed, TestIT will open and the database connection must be set up.
Database Setup
When TestIT have been installed, a Setup and Production database connection must be setup.
Setup DB Connection
- Server: (local)\sqlexpress
- Checkmark 'Use Windows Authentication'
- Click Connect
- Database: TestITSetup
- Click Save
Production DB Connection
- Server: (local)\sqlexpress
- Checkmark 'Use Windows Authentication'
- Click Connect
- Database: TestITProd
- Click Save
The TestIT setup page should now look like this:


