Difference between revisions of "mosCura:Configurator Section"
(→Delete) |
|||
| (9 intermediate revisions by the same user not shown) | |||
| Line 1: | Line 1: | ||
In mosCura Configurator we have added the option either to create a custom Section Group or to autogenerate with standard values. | In mosCura Configurator we have added the option either to create a custom Section Group or to autogenerate with standard values. | ||
| − | ' | + | |
| + | ===Autogenerate Section=== | ||
| + | # Navigate through the menu on the left side, where the “Source Configurator” is located. Extend the menu, and you will see the option to “Create Section Group”. | ||
| + | #When you have pressed the “Create Section Group”, a small window will pop up with the options to generate Nolek's standard Section Groups or to create a custom. | ||
| + | #Press the "Generate" button next to the Section Group you want. | ||
| + | #A message of the process will be displayed. | ||
| + | |||
| + | <gallery> | ||
| + | File:mosCura_configurator_CreateSection.png| Create Section Group | ||
| + | File:mosCura_Configurator_AutogenerateModal.png| Press Generate | ||
| + | File:mosCura_Configurator_Autogenerate_Message.png|Process Message | ||
| + | File:mosCura_Configurator_SectionCreated.png| Created Section Group with Standard Recipe | ||
| + | </gallery> | ||
| + | |||
| + | ===Create Custom Section=== | ||
In order to create a custom “Section Group”: | In order to create a custom “Section Group”: | ||
# Navigate through the menu on the left side, where the “Source Configurator” is located. Extend the menu, and you will see the option to “Create Section Group”. | # Navigate through the menu on the left side, where the “Source Configurator” is located. Extend the menu, and you will see the option to “Create Section Group”. | ||
| − | #When you have pressed the “Create Section Group”, the page, where you can type in the values of the Section Group, will open. | + | #When you have pressed the “Create Section Group”, select the "Create" next to the "Custom Section". |
| + | #The page, where you can type in the values of the Section Group, will open. | ||
#Fill in all the inputs and then press “Create” on the top of the right side on the page. | #Fill in all the inputs and then press “Create” on the top of the right side on the page. | ||
#mosCura will ask to create a Standard Recipe | #mosCura will ask to create a Standard Recipe | ||
| Line 16: | Line 31: | ||
File:mosCura_configurator_SectionInputs.png| Fill inputs | File:mosCura_configurator_SectionInputs.png| Fill inputs | ||
File:MosCura_configurator_AutogenerateRecipe.png|Autogenerate Standard Recipe | File:MosCura_configurator_AutogenerateRecipe.png|Autogenerate Standard Recipe | ||
| − | File: | + | File:mosCura_Configurator_SectionCreated.png| Created Section Group with Standard Recipe |
</gallery> | </gallery> | ||
| − | + | ===Update=== | |
| − | |||
| − | |||
| − | |||
To update the values of the Section Group, you should replace the existing values in the panel with the Section Group, and then press the “Update” button in the top right corner. | To update the values of the Section Group, you should replace the existing values in the panel with the Section Group, and then press the “Update” button in the top right corner. | ||
<gallery> | <gallery> | ||
| − | File: | + | File: mosCura_Configurator_UpdateSection.png|Change values and press update |
</gallery> | </gallery> | ||
| − | |||
| − | If you need to delete the Section Group, you can click on the button with a bin icon, which is placed in the top panel in the right corner. | + | ===Delete=== |
| + | |||
| + | If you need to delete the Section Group, you can click on the button with a bin icon, which is placed in the top panel in the right corner. | ||
| + | # Press the button. | ||
| + | # A confirmation message will pop up. | ||
| + | # Press “OK” to continue the process, or “Cancel” to stop it. | ||
| + | |||
<gallery> | <gallery> | ||
File:mosCura_configurator_DeleteSection.png|Delete Section | File:mosCura_configurator_DeleteSection.png|Delete Section | ||
Latest revision as of 12:04, 21 November 2019
In mosCura Configurator we have added the option either to create a custom Section Group or to autogenerate with standard values.
Autogenerate Section
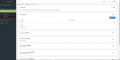
- Navigate through the menu on the left side, where the “Source Configurator” is located. Extend the menu, and you will see the option to “Create Section Group”.
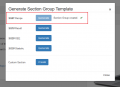
- When you have pressed the “Create Section Group”, a small window will pop up with the options to generate Nolek's standard Section Groups or to create a custom.
- Press the "Generate" button next to the Section Group you want.
- A message of the process will be displayed.

Create Section Group

Press Generate
Process Message
Created Section Group with Standard Recipe


Create Custom Section
In order to create a custom “Section Group”:
- Navigate through the menu on the left side, where the “Source Configurator” is located. Extend the menu, and you will see the option to “Create Section Group”.
- When you have pressed the “Create Section Group”, select the "Create" next to the "Custom Section".
- The page, where you can type in the values of the Section Group, will open.
- Fill in all the inputs and then press “Create” on the top of the right side on the page.
- mosCura will ask to create a Standard Recipe
- Press "Ok" to create or "Cancel" to not create the Standard Recipe.
- If any error occurs during the process of the creation, an alert will show up regarding the error
- If no errors occur, mosCura will redirect to the “Configurator” page, and the newly created Section can be seen in the left menu
- Press "Ok" to create or "Cancel" to not create the Standard Recipe.
Create Section Group
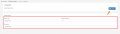
Fill inputs
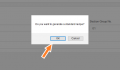
Autogenerate Standard Recipe
Created Section Group with Standard Recipe


Update
To update the values of the Section Group, you should replace the existing values in the panel with the Section Group, and then press the “Update” button in the top right corner.

Change values and press update

Delete
If you need to delete the Section Group, you can click on the button with a bin icon, which is placed in the top panel in the right corner.
- Press the button.
- A confirmation message will pop up.
- Press “OK” to continue the process, or “Cancel” to stop it.

Delete Section
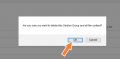
Confirm delete process


