Difference between revisions of "mosCura:Configurator DataHandler"
Jump to navigation
Jump to search
(Created page with "'''Create''' # To create a new Data Handler, click on the dropdown button, which is placed at the Section Group panel in the right corner, and then press “+Data Handler”...") |
|||
| Line 27: | Line 27: | ||
File:mosCura_configurator_DataHandler_DeleteConfirmation.png|Confirm delete process | File:mosCura_configurator_DataHandler_DeleteConfirmation.png|Confirm delete process | ||
</gallery> | </gallery> | ||
| + | |||
| + | |||
| + | [[mosCura:Configurator|Back to Configurator]]<br /> | ||
Revision as of 10:38, 21 November 2019
Create
- To create a new Data Handler, click on the dropdown button, which is placed at the Section Group panel in the right corner, and then press “+Data Handler”
- When you have clicked the button, a new window will appear with the required inputs. Fill in all the fields and then press “Create”
- When the process is finished, a new panel with the Data Handler and 3 default items will be placed under the Section Group

Press “+Data Handler”
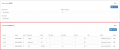
Newly created Data Handler


Create Item Data Handler
- To create a new Item in the Data Handler, extend the dropdown and press "New Item"
- Fill in all the Inputs and press "Create"

Press "New Item"
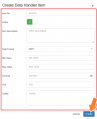
Fill in inputs and press "Create"


Delete
- To delete a Data Handler and all the items inside, you have to extend the dropdown button and press “Delete”
- When you have clicked “Delete”, a confirmation message will pop up; here you should press “OK” to finish the process, or press “Cancel” to cancel it
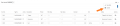
Press Delete
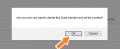
Confirm delete process


